

Cheap and Easy ways to sell more jewelry
Does your jewelry display need a refresh? Are you missing sales because your new jewelry is being overlooked on old displays?
We’ve come up with more cheap and easy solutions to help! Let’s give life back to your visuals.
Follow these easy steps to update your jewelry displays and sell more jewelry!
P.S. All of the jewelry below is from our newest collection. SHOP THE COLLECTION HERE!

1. PAINT YOUR NECK STANDS
Just about any type of neck stand can be painted with acrylic paint. We’re using burlap in our example but synthetic leather and even velvet can also be painted.
What you need:
Neck stands to be painted
Acrylic paint – one or two colors, we used interior wall paint with a satin finish and a metallic craft paint for the back.
Paintbrush
Masking tape or a steady hand
Paper or plastic to cover your work area


Paint the front of the neck stand with acrylic paint and allow to dry. Then paint the back with the contrasting color. If your hand isn’t steady, the edges can be masked with blue painters tape to maintain a clean line. Allow to dry at least 48 hours before adding the jewelry.
2. Half Moon Bracelet Display
What you need:
Large pool noodle (4” diameter) the length of your display
Serrated bread knife
Material to cover the noodle – we used a suede scrap but felt and fabric work great as well
Hot glue gun and glue sticks
Marker


Cut the pool noodle in half with the serrated bread knife.


You will need 3 pieces of material to cover each half of the noodle. Trace the length of the noodle and cut a rectangle the same size as the noodle is wide, and long enough to wrap all the way around. Cut two half circles ½” larger than the end of the noodle. Cut notches in the ½” margin.


With a glue gun, attach the half circles to the ends of the noodles. Glue down the notched pieces.


After the ends are covered, glue the rectangle piece of fabric around the noodle starting at the center of the flat bottom. These are great for displaying chain bracelets and watchbands.
Here’s the finished display.

3. Add Nails to a Wooden T-bar Display
Adding nails across the top of a t-bar give you more display options. They serve as separators between fine chain necklaces to help prevent tangling. They also allow you to hang pendant necklaces front-facing to better highlight the pendants instead of side facing.
What you need:
Wooden t-bar necklace display
Decorative nails (we use upholstery nails)
Small hammer
Needle nose pliers (optional)

We gave ours a fresh coat of spray paint before we started.

Make sure one half of the t-bar is supported on a countertop and hammer in the nails. We measured out the spacing and marked the placement with a pencil before we started. If the nails are hard to hold, you can steady them with needle nose pliers while hammering. An extra person can be helpful here.


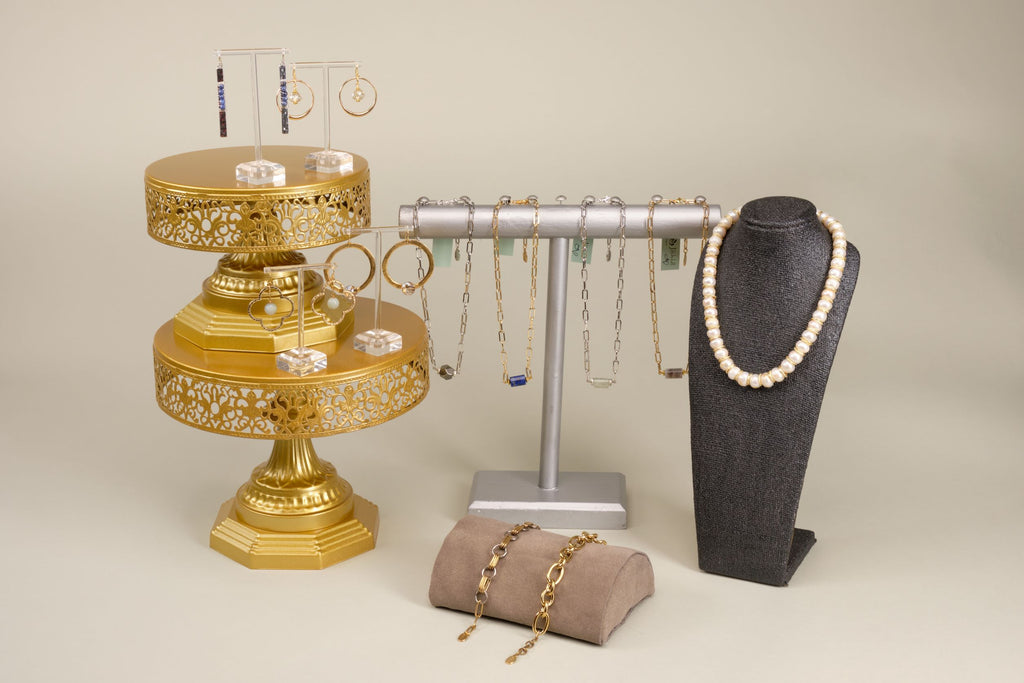
4. Use Cake Stands (or other household items) as Risers for your fixtures.
Think outside of the box. Look for creative and different items to use as risers. Go to a discount home goods store and just browse around. Thrift or resale stores are also a great hunting ground. Items can be given new life with a fresh coat of spray paint. We found these beautiful cake stands at a consignment store and painted them metallic gold.

5. ADD MOTION TO YOUR DISPLAYS WITH A LAZY SUSAN
What you need:
Lazy susan component to fit the item you want to revolve. These are available at larger hardware stores in a wide variety of sizes.
Block of wood the size of the lazy susan component
Screws to attach the component to the wood
Screwdriver/drill


Attach the lazy susan to the wooden block. Set the item on the wooden block to make it revolve. The item can be stabilized with double stick foam tape if necessary. Our block is sized to tuck under the base of the cake stand. These work well in a tight corner so more items can be seen by turning the display.